A DJ controller test that lasts ten minutes tells you nothing. You tap a few pads, spin the jog wheel once, nod at whoever is watching, and three months later you are on a forum asking why the crossfader crackles in the third hour of a set.
I have been DJing clubs for eight years and weddings for five, and I have watched more controllers die mid-gig than I want to count. The gap between a controller that survives 500 hours and one that dies at a paying gig usually shows up in the first four hours, if you know what to look for. So this is the DJ controller test I run on every unit that comes through my place in Brooklyn, plus the two controllers I point people toward at opposite ends of the market.
Why you should trust me
Eight years in clubs, five years of weddings, everything from a 200-capacity basement to a 4,000-person warehouse. I own three controllers and a storage unit full of gear my friends keep borrowing.
I do not review anything I have not played a full set length on. Thirty minutes of messing around does not count. I do not review mixers, because controllers are the lane. And I do not call anything club ready unless I have actually used it at a gig.
The rules matter more than the gear list. Every check in this article is something you can run yourself in an afternoon, and none of it requires a showroom or a salesperson standing over your shoulder.
How I picked and how I tested
The test has three parts, and they run in this order.
First, a four-hour set with real transitions. Not loops, not cue point drills. Actual mixes, with tracks I do not know by heart, because that is when your hands stop thinking and your gear starts revealing itself.
Second, a fader smash session. Fast cuts, slow cuts, crab scratches, and the kind of aggressive channel work that voids a warranty in spirit if not in writing. Faders die. The question is whether they die at a gig or after 500 hours in the studio, and this is the cheapest way to find out which.
Third, the jog wheel check with my eyes closed. Feel beats specs. A jog wheel with no resistance makes every pitch bend feel like a mistake, and no spec sheet will tell you that. Close your eyes, nudge the platter, and see whether your hand knows where the track is.
The two controllers below sit at opposite ends of that test. One is a USB controller that ships with a software bundle and belongs in a bedroom. The other is a motorized standalone unit built for people who came from turntables and play out regularly. I am listing them together because the question I get most is not "which controller" but "how much controller do I actually need right now."
The two controllers to test first
Software bundles matter more than hardware specs. A controller is only as good as the software it ships with, because the bundle is half the value and the subscription you did not plan for is the other half. Keep that in mind while you read these two.
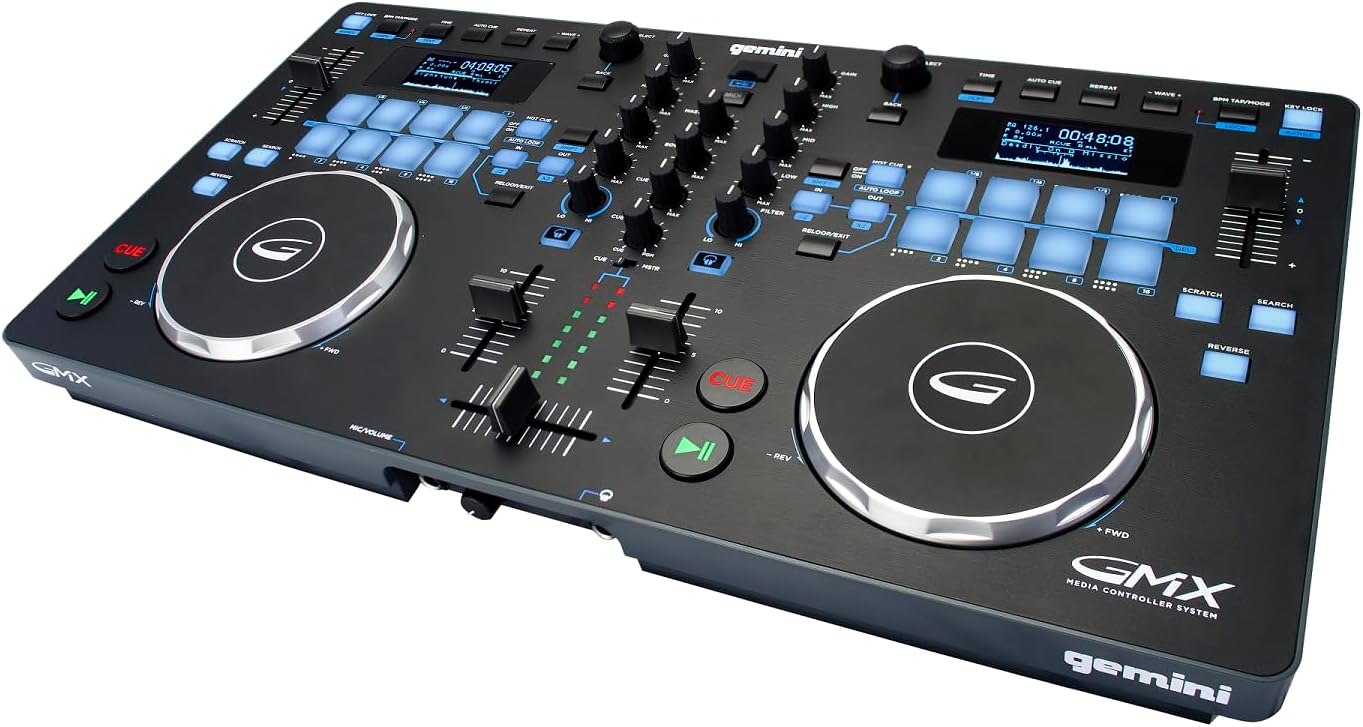
Budget pick: Gemini USB DJ Controller & Media Player, VirtualDJ LE (GMX)
 Visit on Amazon →
This is the entry point I hand to people who are still deciding whether DJing is a hobby or a phase, and the reason is the bundle. The Gemini ships with VirtualDJ LE, which means you can plug in, install, and start practicing the same night instead of spending your first two weeks reading forum threads about software. Check current Amazon price, because the entry tier moves around with sales and bundles.
What it does well: it is a USB controller, so your laptop is the brain, and that keeps the cost down while giving you a real hardware layout to learn on. You do not need four channels to start. You need two solid channels and a brain that plans transitions.
Flaws but not dealbreakers: It is a USB controller, so there is no playing without a laptop in the chain. This is also entry-tier hardware, which means the faders will not feel like a flagship unit. Treat the crossfader with some respect, keep the controller out of a dusty bag, and run the fader smash test early so you know exactly what you have.
Who it is for: Anyone who wants to practice every night, learn gain staging on real hardware, and find out whether they actually enjoy mixing before spending flagship money. Gear is not the bottleneck. Practice is.
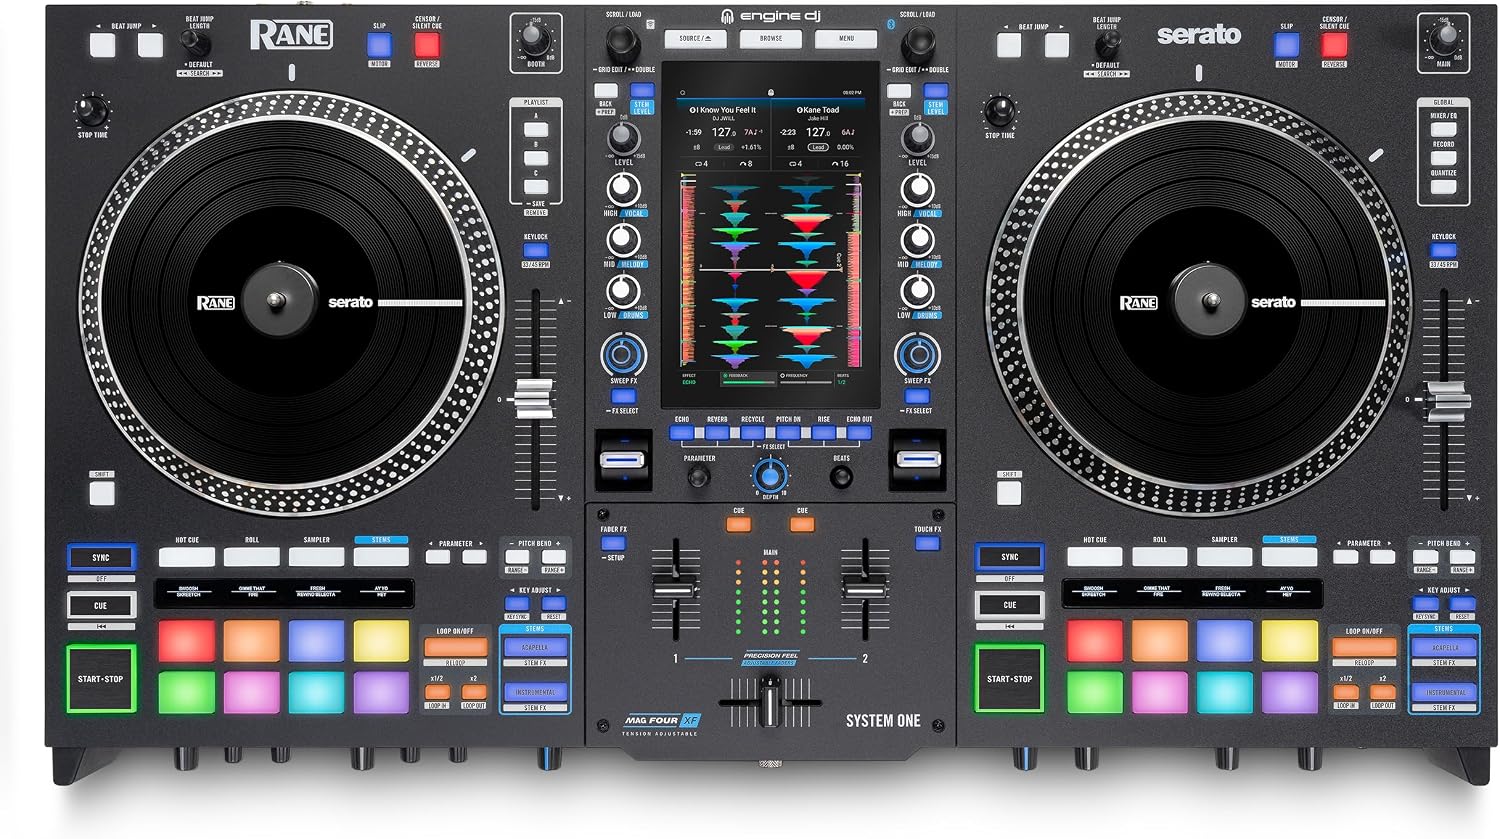
Upgrade pick: RANE SYSTEM ONE Motorized Standalone DJ Controller
 Visit on Amazon →
This is the other end of the test, and the name tells you most of it. Motorized means the platters move on their own, so the surface under your hand behaves like a turntable instead of a static pad with a sensor. Standalone means no laptop in the chain, which changes how you build a set and how you pack for a gig. Check current Amazon price before you compare it to anything, because this is a different budget conversation entirely.
If you came from vinyl or turntables, motorized platters are the feature that makes a controller feel like an instrument instead of a remote control. The eyes-closed check is where that shows up. If you have never touched a turntable, you may not care, and that is fine. Plenty of working DJs mix on static jog wheels every weekend and never think about it.
Flaws but not dealbreakers: Standalone means you manage your library on the unit, so your prep workflow changes. This is also flagship-tier gear that expects a working DJ's budget and gig schedule to justify it. I would not suggest it as a first controller for someone who has never played a paid set.
Who it is for: Working DJs, turntable converts, and anyone who has already outgrown a laptop-based setup and knows exactly why they want motorized platters under their hands.
The actual test workflow
Now the part you came for. This works on any controller at any price, and it takes about a week if you do it honestly.
Step one: Read the software bundle first. Before you touch hardware, find out what ships in the box and what it costs to keep using after the trial ends. A controller that requires a subscription for basic features is a controller with a monthly bill attached. This is the single most common thing beginners miss, and it is the first thing I check.
Step two: The eyes-closed jog check. Power on, load a track, close your eyes, and nudge the platter. You are looking for resistance and consistency. Cheap plastic wheels feel like a toy steering wheel: light, vague, and impossible to be precise with. Good ones push back a little and return to center predictably. This takes 30 seconds and tells you more than any spec sheet.
Step three: The fader smash session. Do 50 fast cuts on the crossfader, then 50 slow ones, then switch channels back and forth until your wrist complains. You are listening for crackle, watching for lag, and feeling for grit. If a fader already feels uneven in the first hour, it will be a problem in the first year.
Step four: Gain staging. Set your channel trims so the loudest part of a track peaks near the top of the meter without touching the red, then ride the master and watch the meters. Nobody buys gear for this skill, and it is the one that decides whether your set sounds clean or clipped. Do it on every channel, with every track, for a week. If the controller makes this hard, that matters more than pad count.
Step five: The four-hour set. Not four hours of loops. Four hours of real transitions, including the hour where you read the room and the gear reveals itself. Hands get tired, ears get tired, and that is exactly when you learn whether the layout makes sense without looking down.
Step six: The port check. Look at every connector before you commit: USB, RCA, XLR, headphone jacks, power. Wiggle each cable gently while a track plays and listen for dropouts. A loose USB port is the most annoying failure in DJ gear because it takes the whole rig down mid-mix.
Step seven: The cue check. Set a cue point, listen in your headphones, and mix with split cue if the unit supports it. Headphone monitoring is the part of a controller nobody reviews and everybody uses. If the cue mix is awkward, you will fight it every set.
Step eight: The resale check. Before you buy, search for the model used. If a controller holds value, you can upgrade later without eating the whole loss. If nobody wants it used, you are married to it.
Caveats worth saying out loud: "Pro-grade" stamped on a plastic chassis means nothing. RGB lights on a controller with cheap faders are a warning sign, not a feature. And a jog wheel with no resistance is not a style preference, it is a design shortcut.
How to choose between the two
If you are new, buy the one with the software bundle and the laptop requirement, then spend the money you saved on music and practice time. You can learn gain staging, phrasing, and transition planning on entry hardware, and those skills transfer to every controller you ever touch.
If you already play out, already know your library, and your hands miss turntables, the motorized standalone unit is the one that stops you thinking about the gear. That is the whole point. The best controller is the one you forget about while you are mixing.
What this all costs
The two tiers here are entry level and flagship, and they do not overlap. Check current Amazon price on both listings before you decide, since both move with sales and bundles.
The math I use is cost per gig, not cost per feature. Divide what you pay by the number of sets you will realistically play in the next two years, and the entry controller almost always wins for a beginner, because the honest number of gigs in year one is usually small. For a working DJ playing most weekends, the flagship tier pays for itself differently: it is the tool that keeps working when the laptop is the weak link, and that is worth more than the spec sheet suggests.
Either way, do not buy a controller to fix bad transitions. Gear does not fix them. Practice does.
The bottom line
Run the test. Software bundle first, then the eyes-closed jog check, then the fader smash, then a full four-hour set. If the controller survives that, you will not be shopping again in six months, and if it does not, you will know before the return window closes.
Start with what lets you practice every night. Upgrade when your gig schedule pays for it. That is the whole method.