Most DJ controller setups fail for the same boring reason: the buyer picks hardware before they pick a workflow. You end up with four channels you never touch, jog wheels that feel like a toy steering wheel, and a software bundle that wants a subscription before it will let you record a set.
Getting your DJ controller setup right is less about the box and more about the job. A standalone rig that fits in a backpack and a four-channel workhorse that lives in a flight case are two different answers to two different questions, and plenty of working DJs end up owning both.
This guide is the setup I would hand a friend: how to choose between the two rigs below, what to do in the first hour after the box arrives, and the checks that separate a controller that survives 500 hours from one that dies mid-set.
Why you should trust me
I have played everything from 200-capacity basements to a 4,000-person warehouse, eight years in clubs and five years at weddings, and I run every controller through the same three-part test: a four-hour set with real transitions, a fader session that would void the warranty, and a jog wheel check with my eyes closed. Thirty minutes of playing around in a store does not count, and I will not pretend it does.
I also own three controllers and a storage unit full of gear my friends keep borrowing, so I know which parts fail first. It is never the screen. It is the crossfader, the headphone jack, and the USB port you plug into forty times a month.
How I picked these two (and how to test yours)
Two jobs, two rigs. That is the whole logic.
If you play clubs, mobile gigs, and weddings, you need channels, a full-size layout, and software the booth already speaks. If you play pop-ups, rooftops, and travel gigs, you need something you can carry in one trip from the car, with no laptop in the chain.
The checklist I run before I would recommend anything:
- The software bundle. A controller is only as good as the software it ships with. Basics locked behind a subscription are a dealbreaker for me.
- Jog wheel feel. Close your eyes and touch the platter. If there is no resistance and no weight, every pitch bend feels like a guess.
- Fader life. Faders die. The question is whether they die at a gig or after 500 hours in the studio.
- Channel count you will actually use. You do not need four channels to start. You need two solid channels and a brain that plans transitions.
- The cable kit. XLR outs, RCA backups, a spare USB cable. A gig is not the place to discover you are missing an adapter.
Then run your own test in this order: update the firmware, analyze your library, set your gains at unity, and play a full set length at home before you take it anywhere. If a unit fights you in hour three at home, it will fight you in front of a crowd.
The two rigs that cover most gigs
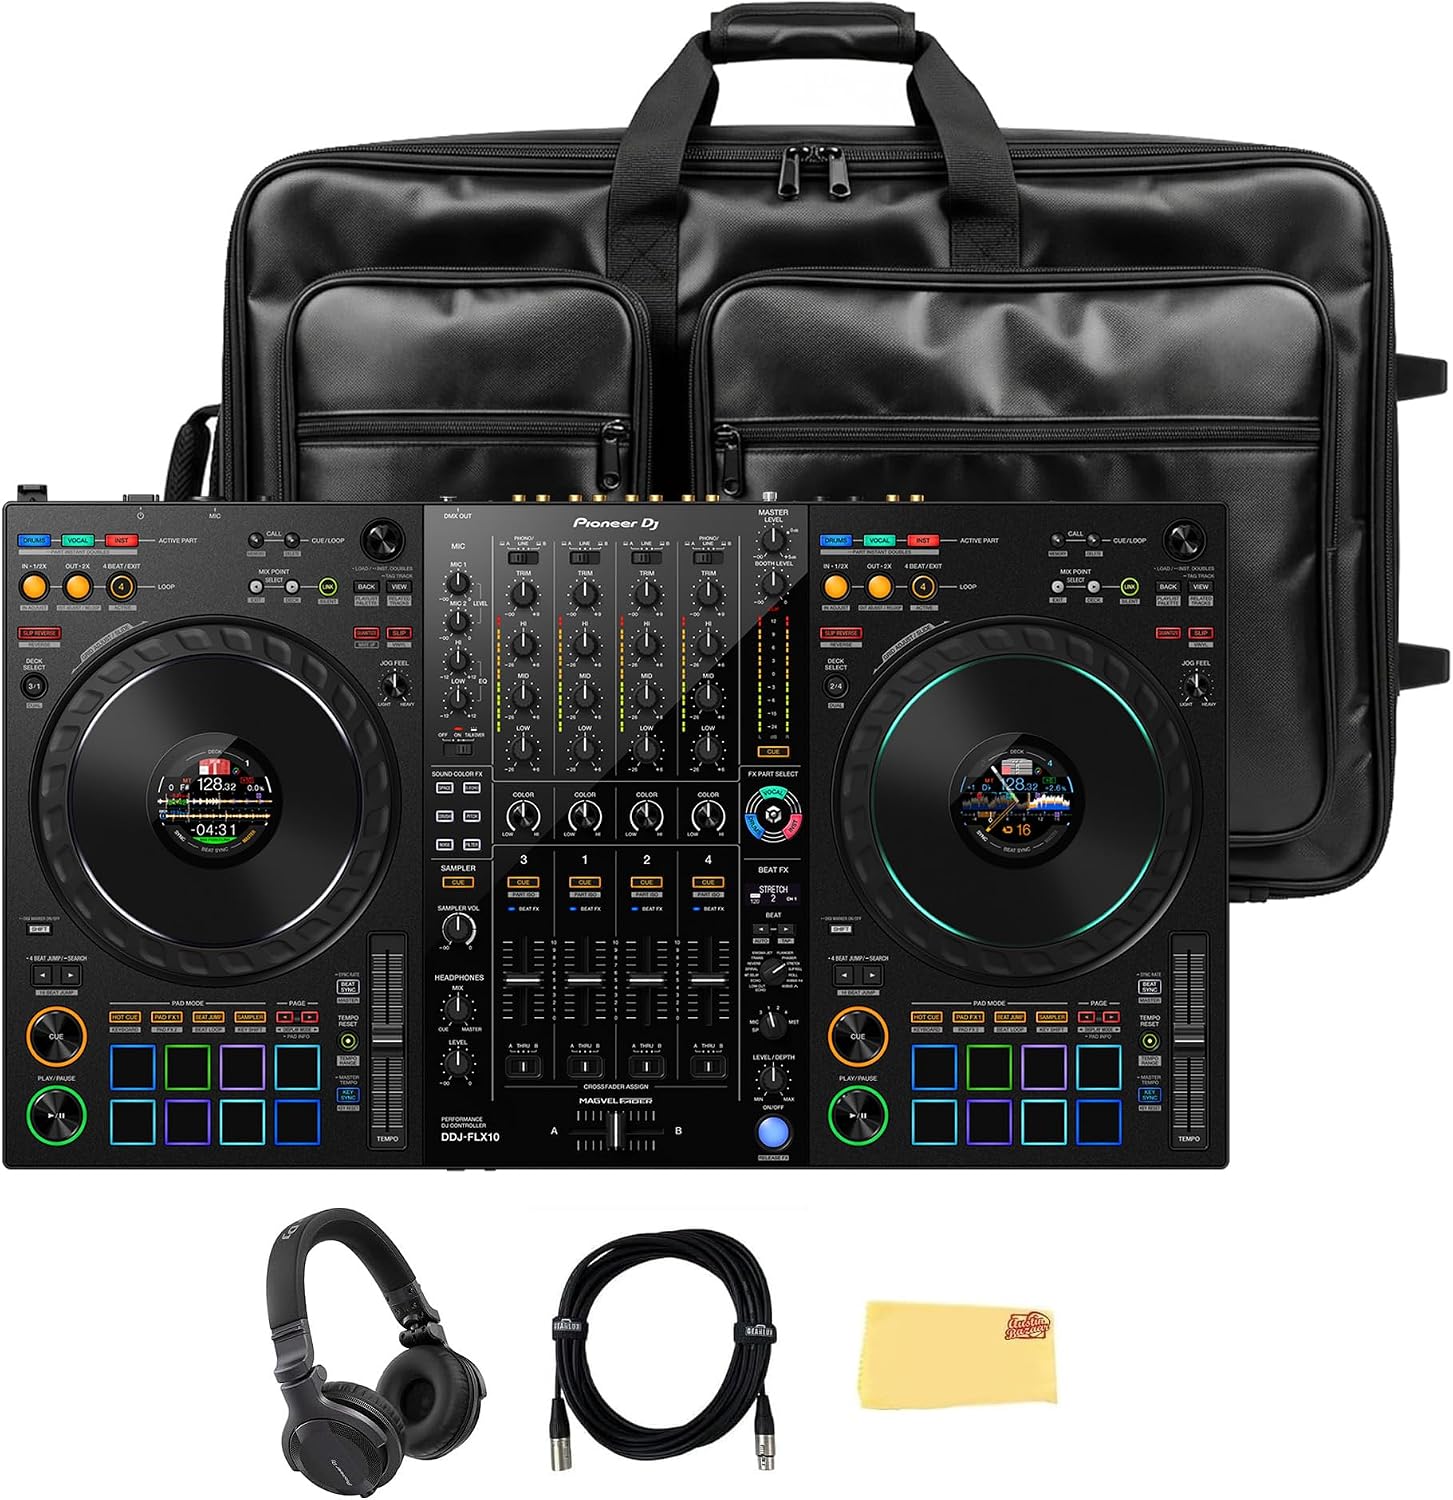
The club-and-wedding workhorse: Pioneer DJ DDJ-FLX10 4-Channel Professional DJ Controller - Black Bundle with Carrying Case, HDJ-CUE1 Headphones, XLR Cable, and Austin Bazaar Polishing Cloth
 Visit on Amazon →
This is the four-channel rig for the DJ who plays a club Friday and a wedding Saturday and does not want to relearn a layout in between. Pioneer builds the DDJ line around the rekordbox workflow, and the industry standard is the standard for a reason: when you walk into a booth with club media players, the muscle memory transfers instead of resetting.
The bundle is what makes this the practical pick rather than the aspirational one. The carrying case means the controller leaves the house protected instead of riding on the back seat under a jacket. The HDJ-CUE1 headphones and the XLR cable mean you can take it to a first paid gig without a second shopping trip, and the polishing cloth is a small thing that matters if your gear ends up in photos. If you already own a case and headphones, you are paying twice for the same idea, and a bare unit might suit you better.
Flaws but not dealbreakers: Four channels is more controller than a beginner needs, and a bigger footprint means a bigger bag and a heavier load-in. If your gigs all happen in one room with one setup, that is fine. If you are loading in and out five nights a week, think hard about whether you want this much deck.
Anyone playing a mix of club nights and private events, who wants one layout that covers both, should start here.
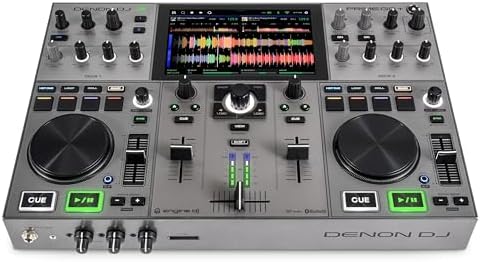
The standalone travel rig: Denon DJ PRIME GO+ Standalone Portable DJ Controller
 Visit on Amazon →
Standalone is the word that matters. The PRIME GO+ plays your library without a laptop in the chain, and that changes your setup time, your failure points, and how you pack. No laptop means no dongle, no operating system update prompt at 9 p.m., and no screen going to sleep in the middle of a set.
For rooftop parties, pop-ups, and weddings where the couple wants music through cocktail hour and you do not want a computer on a folding table, this is the rig that earns its keep. It runs Denon's Engine platform, so your prep happens before the gig: build the playlists, analyze the tracks, export to USB, and the unit plays them back like a media player. That is a genuinely different way to work, and for mobile DJs it is usually the better one.
The tradeoff is layout. A portable standalone unit is smaller than a four-channel controller by design, so the controls sit closer together and the faders are shorter. Some DJs love that. Some DJs cannot mix on it without looking down. That is a personal fit question, and it is the one thing you cannot settle from a spec sheet.
Flaws but not dealbreakers: If you are a Serato or rekordbox loyalist with years of hot cues in one library, moving to a standalone platform means rebuilding your prep workflow. It is not hard, but it is not free either.
Anyone who gigs in borrowed rooms, travels with their gear, or wants a setup that fits in one trip from the car should look here first.
The setup workflow, step by step
Step one: inventory the box before you plug anything in. Open everything, count the cables, and confirm the power supply matches what the listing says. Bundles occasionally ship with regional variants. Do this the day it arrives, not the night before a gig.
Step two: update the firmware first. Every controller ships with whatever firmware left the factory. Update before you build anything, because a firmware update can wipe settings, and you do not want that to happen after you have dialed in your preferences.
Step three: register and authorize the software. Install the bundled software, create the account, and authorize the machine at home on wifi. Read which tier you are on before you build your whole library around it, because software that charges a subscription for basic features is a trap that costs you every month.
Step four: analyze your library offline. Run the analysis on everything before the first gig. Beat grids and waveforms are what you mix against, and a track analyzed wrong is a train wreck waiting for a dance floor. Go back and fix the grids on the twenty tracks you play most.
Step five: set your gains at unity. Gain staging is the skill nobody buys gear for. Set your channel trims so a track at its loudest does not clip the master, then leave them alone. If you are pushing the master to hear yourself, you have a gain structure problem, not a controller problem.
Step six: dial in the jog wheel feel. Close your eyes and nudge the platter. You should be able to bend pitch in tiny increments without watching a screen. If the wheel feels loose, adjust tension or sensitivity in the settings, then test again with your eyes shut. If it still feels like a toy steering wheel, return it inside the window. Jog wheel feel is the soul of a controller, and practice does not fix a bad one.
Step seven: set cue points on your go-to tracks. Pick the twenty tracks you always play and set hot cues on the intro, the first drop, and the outro. This is what makes transitions fast under pressure. Do it once per genre and your sets get cleaner immediately.
Step eight: run a full-length rehearsal with the exact kit you will take. Four hours, real transitions, no stopping to fix things. Pack the same cables, headphones, and adapters you plan to bring. Finding a problem at hour three at home is a gift. Finding it at hour three of a paying gig is not.
What these two rigs are not
Neither of these is a mixer, a pair of turntables, or a club media player setup. If your goal is vinyl, buy turntables and a mixer, because a controller will not scratch that itch. If your goal is a permanent install in a booth that already has a standard rig, learn on what is there instead of buying around it.
And no controller fixes bad transitions. My mentor taught me that gear is never the bottleneck, practice is. Buy the rig that lets you practice every night, then practice.
What it costs over a year of gigs
I am not going to quote numbers here, because they move and your market is not mine. Check current Amazon price on each listing above and run the math against your own calendar.
The logic is simple. Either of these rigs pays for itself if you gig regularly, and either one is an expensive hobby if you do not. Count your gigs for the next twelve months, divide the cost by that number, and ask whether the per-gig figure feels reasonable. That calculation is more honest than any spec comparison, and it is the one that stops people from buying twice.
Whichever way you go, do the firmware update, set the gains, and put in a four-hour rehearsal before the first paid night. The gear is only half the job. The other half is the hour you spend learning what it feels like under your hands.