A DJ controller setup that survives a real room is not about channel count. It is about whether the software and the hardware agree with each other, whether your levels are right before the floor fills up, and whether you know what the jog wheels feel like when you are not looking at them.
I have been playing clubs for eight years and weddings for five, everything from a 200-capacity basement to a 4,000-person warehouse. In that time I have watched more sets fall apart from a bad headphone cue or a gain stage pushed too hot than from a missing feature on the spec sheet. The gear matters. The order you set it up matters more.
So this is the workflow I run on every controller that comes through my apartment, plus the two units I would actually hand someone starting this process: one that fits in a backpack, one that costs more than most people's first car.
Why you should trust me
I have played paying gigs on three different controllers and I keep a storage unit full of gear my friends borrow and occasionally return. Every controller that lands on my bench gets the same three-part test, no exceptions: a four-hour set with real transitions, a fader smash session, and a jog wheel feel check with my eyes closed. Thirty minutes of messing around does not count as a review, and I do not call anything club ready unless I have actually used it at a gig. I am not a gear reviewer who reads spec sheets for a living. I am a working DJ who has to trust the thing under my hands at 1 a.m. when the room is full and I cannot afford a mistake.
How I picked and how I tested
The three checks above are the whole method, so let me explain what each one actually reveals.
The four-hour set tells you whether the controller is comfortable or just impressive. Most gear feels great for 45 minutes. At hour three, small things become large things: a cramped layout, a knob placed where your wrist wants to rest, a screen angle that makes you lean. If I am fighting the layout at hour three, I will hate it at a gig.
The fader smash session tells you what the crossfader and channel faders are made of. Faders die. That is not pessimism, that is physics. The only real question is whether they die at a paying gig or after 500 hours in your bedroom, and the answer shows up fast when you cut aggressively for an hour.
The eyes-closed jog wheel check is the one I trust most. Close your eyes and touch the platter. Cheap wheels feel like a toy steering wheel, with no resistance and no feedback. Good ones push back just enough that your fingers know where they are without your brain doing math. Jog wheel feel is the soul of a controller. Everything else is a button.
The two controllers this workflow is built for
The steps below work on almost any two-channel or four-channel controller. These two are the ones I would point you toward, and they sit at opposite ends of the money spectrum on purpose.
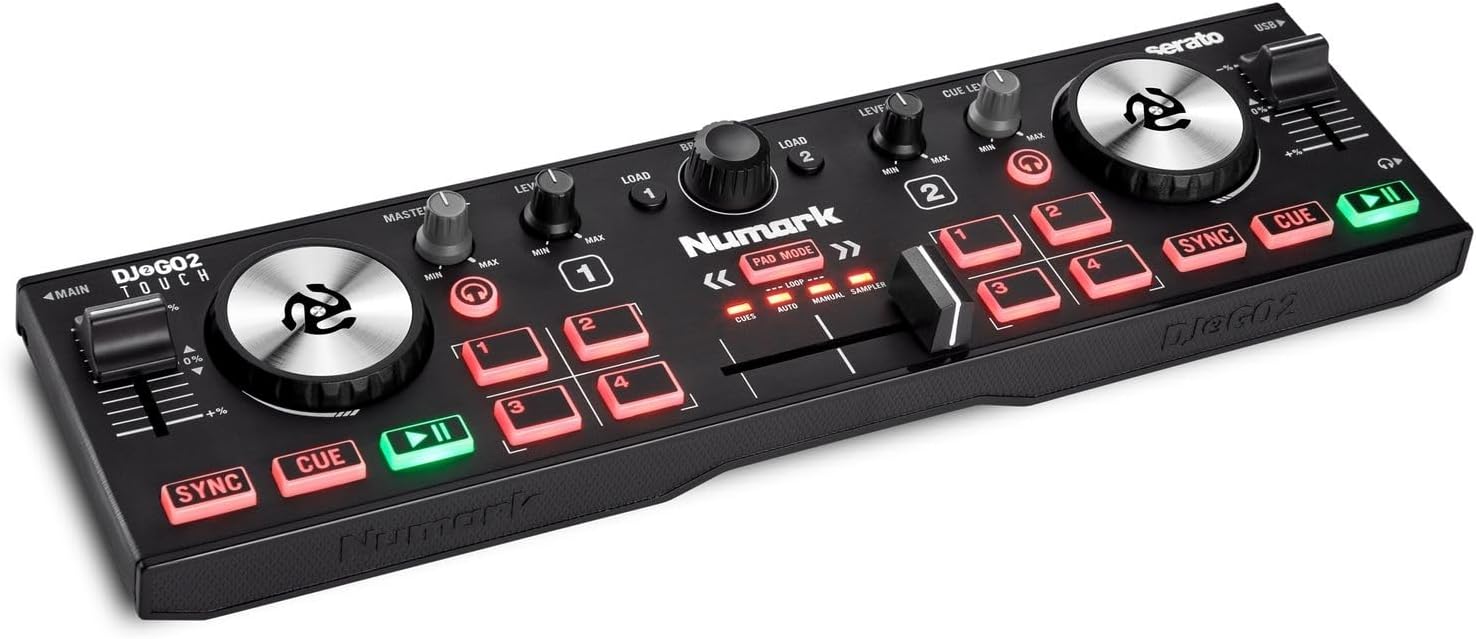
The starter pick: Numark DJ2GO2 Touch Compact DJ Controller
 Visit on Amazon →
This is the smallest thing in the article and the one I recommend to anyone who is not yet sure they will stick with DJing. It is a two-channel controller that fits next to a laptop, it has touch-capacitive jog wheels, and it ships with a Serato DJ Lite license in the box. That bundle is half the value. A controller is only as good as the software it ships with, and Serato Lite is a real platform you can practice on every night without paying a subscription for the basics.
The touch-sensitive wheels are the interesting part at this size. They are small, and they will not feel like full-size platters, but the touch strip on top means you can nudge and scratch without pressing down, which is the skill you actually need to develop. Everything you learn on this transfers up.
Flaws but not dealbreakers: The faders are short-travel and the knobs are small. If you have large hands, the layout gets cramped during long sessions. And the build is plastic, so treat it like the practice tool it is, not the rig you take to a warehouse party.
Anyone learning on a kitchen table, in a dorm room, or on a train commute will get more out of this than out of a mid-tier controller they are afraid to touch.
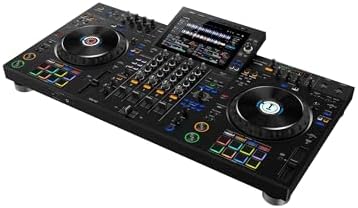
The upgrade pick: Pioneer DJ XDJ-AZ Professional 4-Deck All-in-One DJ System, 10.1-Inch Touchscreen, Built-in Wi-Fi, SonicLink Wireless Tech, Performance Pads & Beat FX, XDJAZ
 Visit on Amazon →
This is the other end of the conversation. Four decks, a 10.1-inch touchscreen, built-in Wi-Fi, SonicLink wireless audio, performance pads and Beat FX, and no laptop required at all. You walk in with a USB drive and a pair of headphones and you are the whole rig.
The no-laptop part is the real feature. Once you have played enough sets, the laptop becomes the least reliable thing in your bag: an update you did not want, a USB port that stops recognizing the controller, a battery that decides tonight is the night. A standalone system removes that entire category of failure. The touchscreen handles waveform browsing and track loading, and the pads and Beat FX sit where your hands already expect them.
I will be honest about who this is for. The industry standard is the standard for a reason, and this is the standard in a single box. It is also a serious purchase that makes no sense if you are still learning what a transition is. Buy it when your library and your ears have outgrown your gear, not before.
Flaws but not dealbreakers: It is heavy, it is expensive, and it assumes you already know how to mix. There is no beginner assist here that does the work for you. And if you never leave your apartment, you are paying for portability and redundancy you will not use.
Anyone playing regular gigs, or planning to, will feel the difference the first time they set up in ten minutes instead of forty.
The setup workflow, step by step
Now the part you came for. This order works on both controllers above and on most others.
Step one: Software before hardware. Install and license the bundled software, then update it, then update the controller firmware from the manufacturer's site. Do not skip the firmware step. Half of the "my controller is not responding" posts on r/Beatmatch are firmware that shipped months before the unit did. On the small Numark that means Serato DJ Lite. On the standalone Pioneer that means preparing a rekordbox library and exporting it to a USB drive before the unit ever gets plugged in.
Step two: Audio routing and headphone cue. Set your master output to your speakers and your cue output to your headphones, then check that the cue mix knob sits where you want it. Before you touch a single track, put on headphones, play a track, and confirm that what you hear in the headphones is not what the room hears. If those two signals are the same, you have a routing problem and you will find out about it in front of people.
Step three: Gain staging. This is the skill nobody buys gear for. Turn the channel trim up until the channel meter peaks in the top of the green, then stop. Set the master so it is not clipping. If you have to push the master past where it wants to go, your source files are too quiet, not your system. Fix it in the trim, not the master. A clipped mix sounds bad on every sound system ever built, and no controller on this list will save you from it.
Step four: Set your cue points before you play. Load eight tracks and set hot cues on each one: the downbeat, the first drop, the vocal entry, the outro. Do this at home, not live. Cue points are the difference between a transition you planned and a transition you survived.
Step five: Jog wheel feel and calibration. Play a track and rest two fingers on the platter. Then close your eyes and do it again. If you cannot feel where the wheel is without looking, adjust the jog sensitivity or the touch sensitivity in the software settings until you can. On a touch-capacitive wheel like the Numark's, spend extra time here, because the top surface reacts differently than the edge.
Step six: Fader and crossfader curve. Set the curve to match how you actually mix. If you cut and scratch, you want a sharp curve that reaches full volume early in the travel. If you blend long transitions, you want something closer to linear. There is no correct setting, only the one that matches your hands.
Step seven: Record yourself. Record a 60-minute set. Listen back the next day with a notepad and write down every transition that made you wince. That list is your practice plan for the week, and it is worth more than any gear upgrade.
Step eight: The four-hour test. Before you take any controller to a gig, play four hours on it at home without skipping tracks or stopping to fix things. If it is still comfortable at hour three, it is ready. If your wrists hurt and your eyes are tired of the screen angle, you learned that for free instead of learning it in front of a paying crowd.
What this workflow will not fix
It will not fix track selection. No controller tells you which song the room wants next, and that is 80% of the job.
It will not fix bad transitions. If your blends are sloppy on a cheap controller, they will be sloppy on an expensive one, just louder. Gear does not fix bad transitions. Practice does.
It will not fix your laptop. A slow machine with a full hard drive and fourteen browser tabs open will stutter and drop audio no matter what is plugged into it.
And this guide is deliberately narrow. It covers controllers. It is not a guide to mixer-only rigs, vinyl setups, or standalone media players, because those are different workflows with different setup steps and different failure points. If you are shopping in those categories, you are reading the wrong article, and that is fine.
What this all costs
The honest math has three parts: the controller, the software, and the headphones.
The software is free at the entry level. Both of the units above ship with a platform that lets you practice without a subscription, which is the single most important thing a beginner bundle can do. If a controller requires a monthly fee for basic features, that is a permanent tax on your hobby, and I would rather you spend that money on music.
The headphones are the part people skip. You will use them more than you use the jog wheels, and a $50 pair with decent isolation will do more for your mixing than a $50 upgrade anywhere else in the chain.
The controller is the variable. The compact Numark costs less than a decent pair of headphones, and the standalone Pioneer costs more than everything else in this article combined. Check current Amazon price on both and run the cost per day over two years. That is the number that matters, not the sticker.
Two solid channels and a brain that plans transitions will carry you through years of sets. Start where you can practice every night, learn your cue points, record yourself, and let the four-hour test tell you when it is time to move up. That is the whole job. The gear is just the thing your hands rest on while you do it.